
Bread rolls are so easy to make at home and with our Everyday Bread Rolls Recipe dare I say we’ve made it almost fool-proof!
Bread rolls are very versatile. They are easily portable when filled for lunch on the go, great for dunking in soups and are a more refined option for serving with dinner (I especially love a warm, buttered roll with our Smoky Butter Bean & Sweet Potato Hotpot ).
If you’re a fan of our White Bread recipe (and from you lovely comments I know that so many of you are and make this recipe so often) you’ll be pleased to hear that these bread rolls are made in exactly the same way with your stand mixer.
You can of course make them entirely by hand but the mixer takes all of the effort out of bread making and gives you excellent. consistent results.
There’s just a small tweak to the ingredients and then a bit of weighing and shaping to make the rolls before baking.
You will see that I have given the liquids in this recipe in grams as I prefer to weigh all of the ingredients for accuracy and consistency. If you would rather use millilitres then use exactly the same measurements – i.e. 100g of milk = 100ml milk
Everyday Bread Rolls Recipe
- 100g milk – whole or semi-skimmed
- 230g hot water – not boiling but hot from the tap
- 10g salt
- 10g vegetable oil
- 500g strong white bread flour
- 7g easy bake yeast
How To Make Everyday Bread Rolls
Weigh
Mix together the milk and the hot water and check the temperature. The blended liquids need to be warm, not hot. If it is too hot it will kill the yeast. We’re looking for a comfortable warmth when you dip your little finger in or if using a thermometer somewhere around 38°c.
Place the liquids in the bowl of your mixer then add the other ingredients. First the salt goes into the liquid, giving it a quick stir to help it dissolve, followed by the vegetable oil.
Pour the flour on top of the liquid and then sprinkle the yeast over the top of the flour.
Mix
Place the bowl into your stand mixer and mix with the dough hook on a low speed until the dough is formed.
Turn the mixer to the next speed (e.g. speed 2 on a Kitchen Aid or speed 1 on a Kenwood Chef) and let the mixer knead the dough for 10 minutes.
If your making the rolls by hand then knead for at least 10 minutes or until the dough is nice and smooth.
Sprinkle a little flour onto your worktop and tip the kneaded dough out.
A little hand kneading is now necessary to bring the dough together into a smooth ball. This is easily done by simply folding the outer edges into the centre, working your way around until you have a ball of smooth dough.
Prove
Pop the dough back into the bowl and cover with a clean dampened square of muslin or tea cloth. Leave in a warm, draught free place to rise for about an hour.
If your kitchen is cold it will take longer to rise and may take up to 2 hours. The dough needs to double in size so keep an eye on it! When you’ve made the recipe a few times you will get to know how long you need to leave it.
Knock Back
When the dough has risen sufficiently tip it out onto a floured work surface and knead gently to knock out the large air bubbles that will have formed
Shape
Now weigh your dough to see how much you have – this will determine the weight of each roll. Divide the weight by the amount of rolls you want to make. I usually make 10 rolls from this dough and so my dough is divided into around 85g portions but you could make 12 smaller rolls or 8 bigger ones!
Useful items for making Everyday Bread Rolls
CLICK ON THE PICTURE TO BE TAKEN TO AMAZON FOR MORE INFORMATION – OPENS IN A NEW TAB
A bakers bench scraper for cutting & dividing dough

A good quality heavy duty baking tray

Muslin Cloth

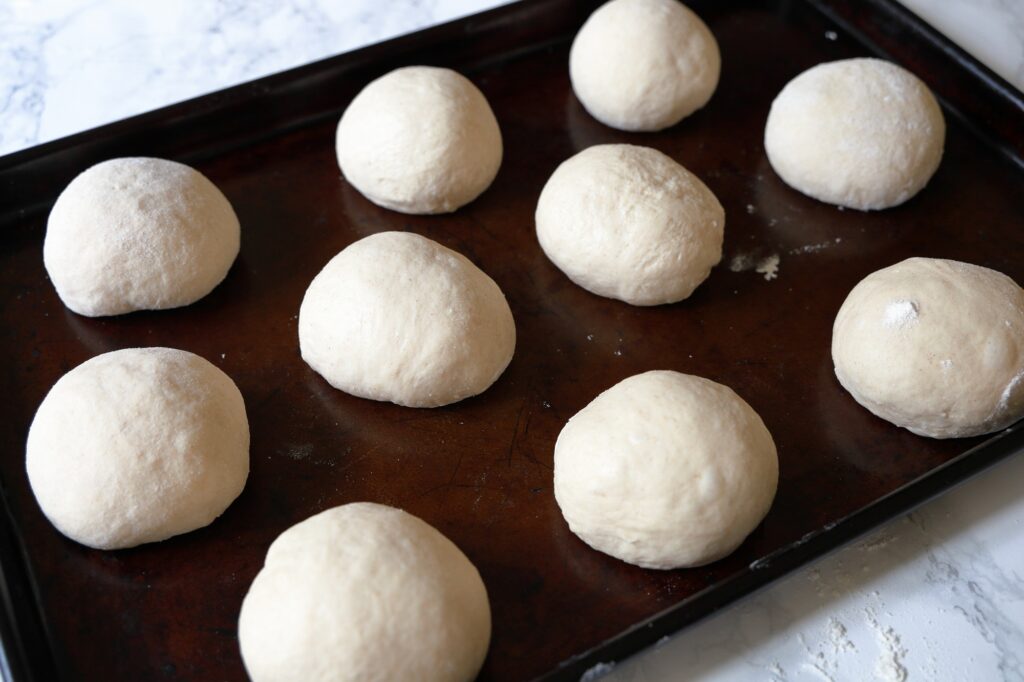
Now use your scales to weigh the dough into roll size portions.
On a lightly floured worktop knead each portion into a ball as before by folding the outer edges to the centre – this gets easier with practice!


Place each roll onto a baking tray spaced slightly apart so that they are not touching. As they rise and grow they will then join together.
Leave To Rise
Cover with a square of clean damp muslin fabric or tea towel and leave to rise for about 40 minutes. Again if your kitchen is cold it could take longer – keep a watchful eye on them until you get used to how long they take in your environment.
When they are nearly ready pre-heat your oven to HOT! I have a fan oven with a dedicated bread baking setting, which bakes the bread at 220°c fan – this equates to 240°c in a non-fan electric oven or Gas Mark 9.
My oven also has a steam setting, which I set to HIGH – if you don’t have a steam setting on your oven you can place a roasting tray in the bottom to heat up then as you put your bread in to bake, pour a cupful of hot water into the pan.
Be very careful as steam will be produced immediately and can cause serious scalds
The steam helps the dough to rise by delaying the drying of surface of the dough therefore allowing the dough to rise more.
Bake
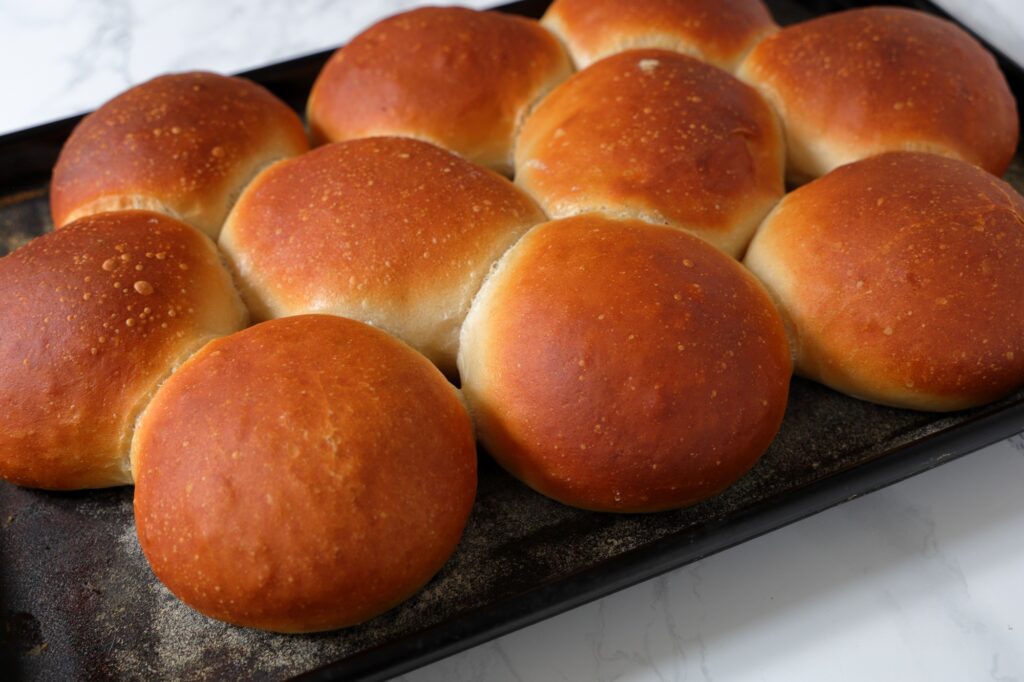
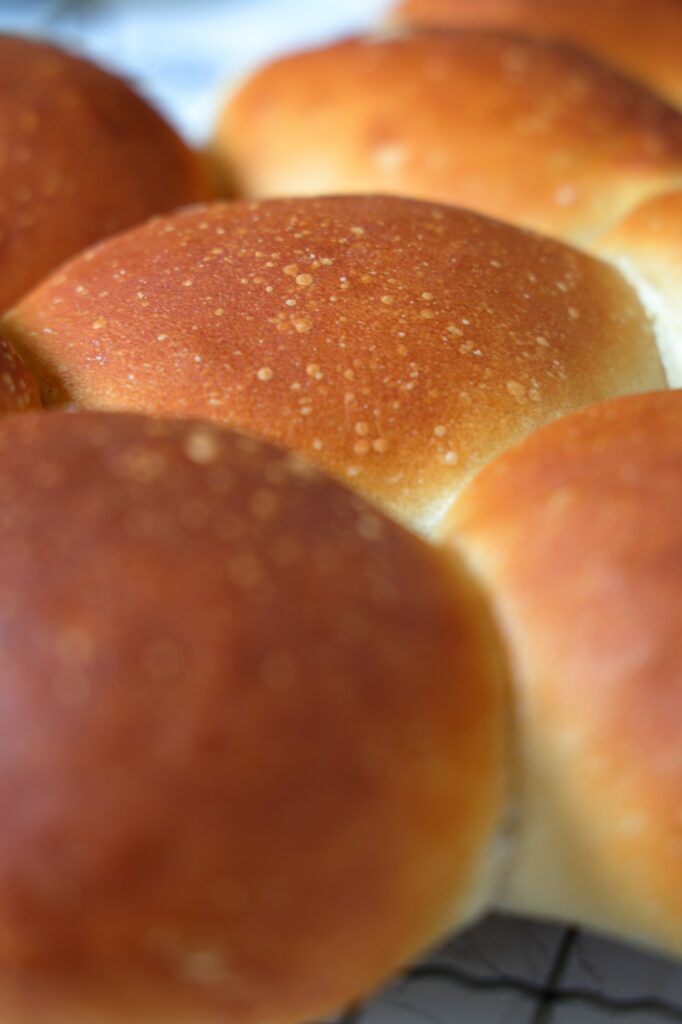
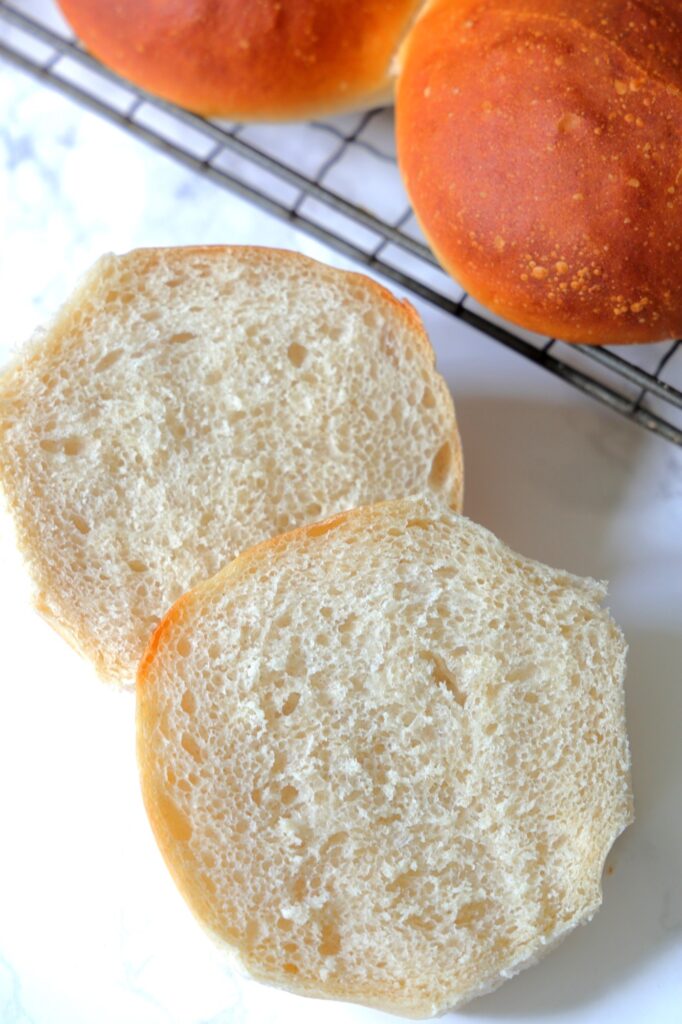
Bake your rolls for 15-20 minutes, depending on how dark and crispy you like the crust – I like mine quite dark!
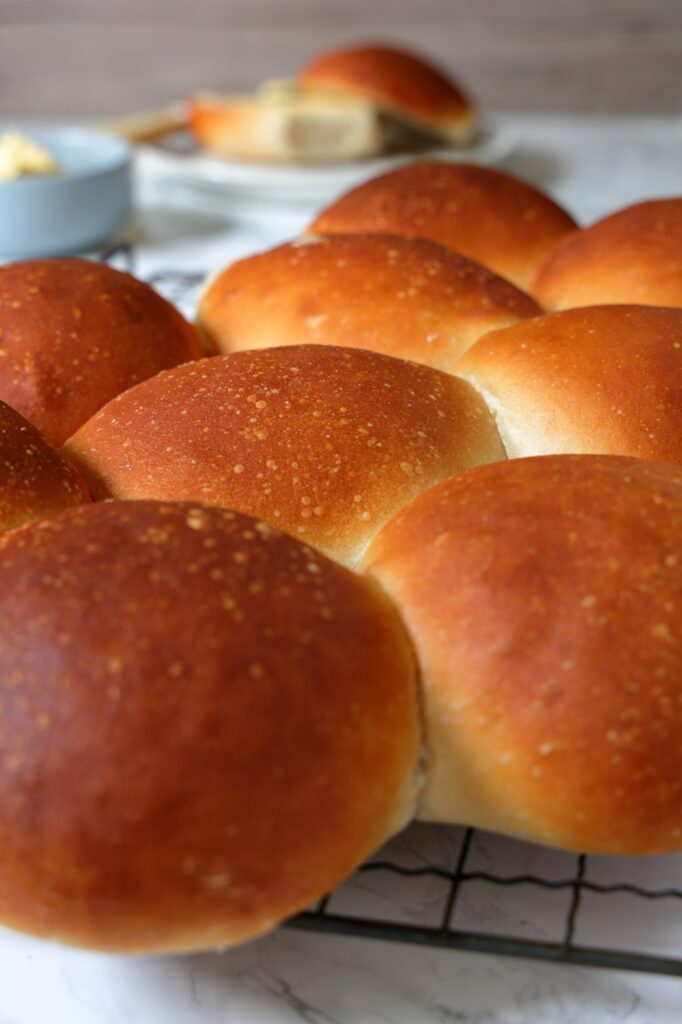
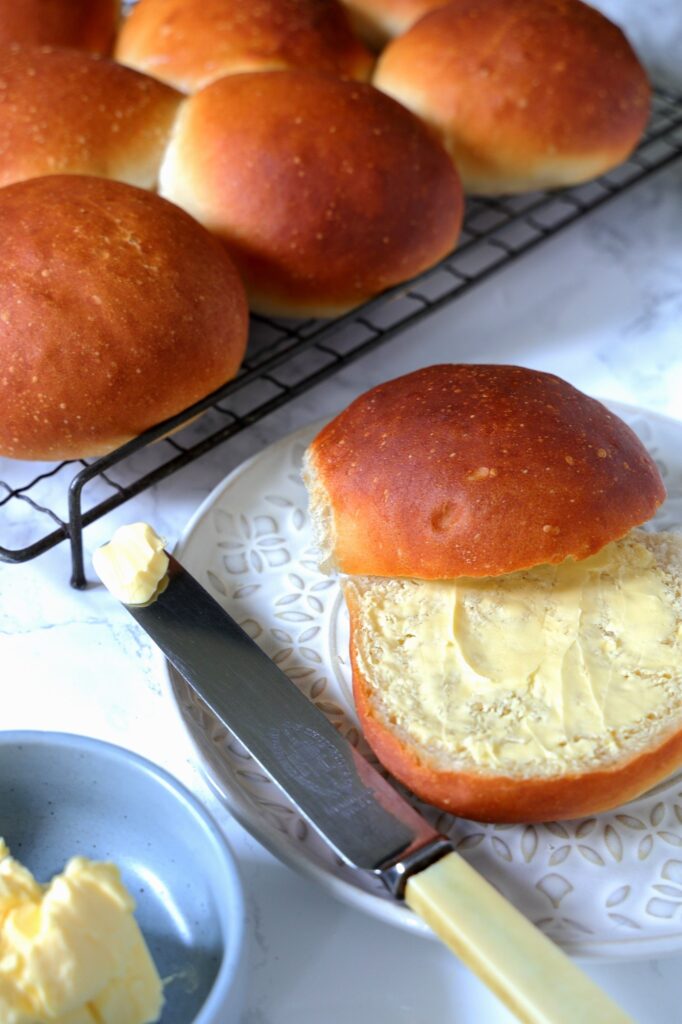
When they have finished baking slide the rolls onto a rack to cool.
Enjoy Homemade Bread Rolls Every Day
The rolls will be deliciously crispy when they come out of the oven but will soften as they cool. If you like really crusty bread rolls then they can be re heated in a moderate oven (160°c fan / 180°c / gas 4) for about 8 minutes to restore that wonderful crust. I usually pop some in the oven towards then end of making dinner so we have lovely fresh baked rolls to eat with our food.
Next day the rolls will be softer and can be refreshed but kept soft by putting them in the microwave on high power for about 20 seconds.
The rolls can be frozen too. Simply pop them into a suitable freezer safe bag or use a beeswax wrap and store them in the freezer ready for fresh baked rolls when you want them.
Freezer Bags We Recommend:
CLICK ON THE PICTURE TO BE TAKEN TO AMAZON FOR MORE INFORMATION – OPENS IN A NEW TAB
Reusable

Compostable

Plastic Free

This is the second time I have made rolls using this recipe and both time they came out great and lots of wonderful compliments!! Thank you !
Hi Tanya, thanks for taking the time to leave a comment, I’m so very pleased to hear that our recipe for bread rolls has been such a success for you!
These everyday bread rolls look absolutely perfect! I love how simple and approachable the recipe is, yet the rolls look so soft and fluffy. They’d be great for just about any meal—sandwiches, dinner sides, or even with a bit of jam. Can’t wait to try making these myself! Thanks for sharing such an easy and tasty recipe