
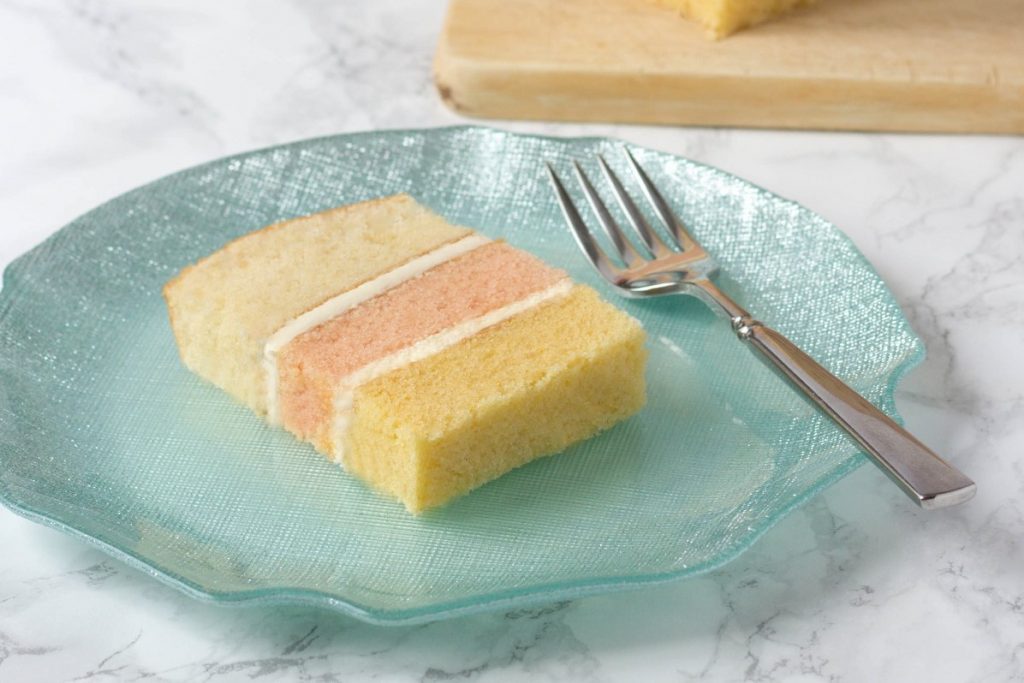
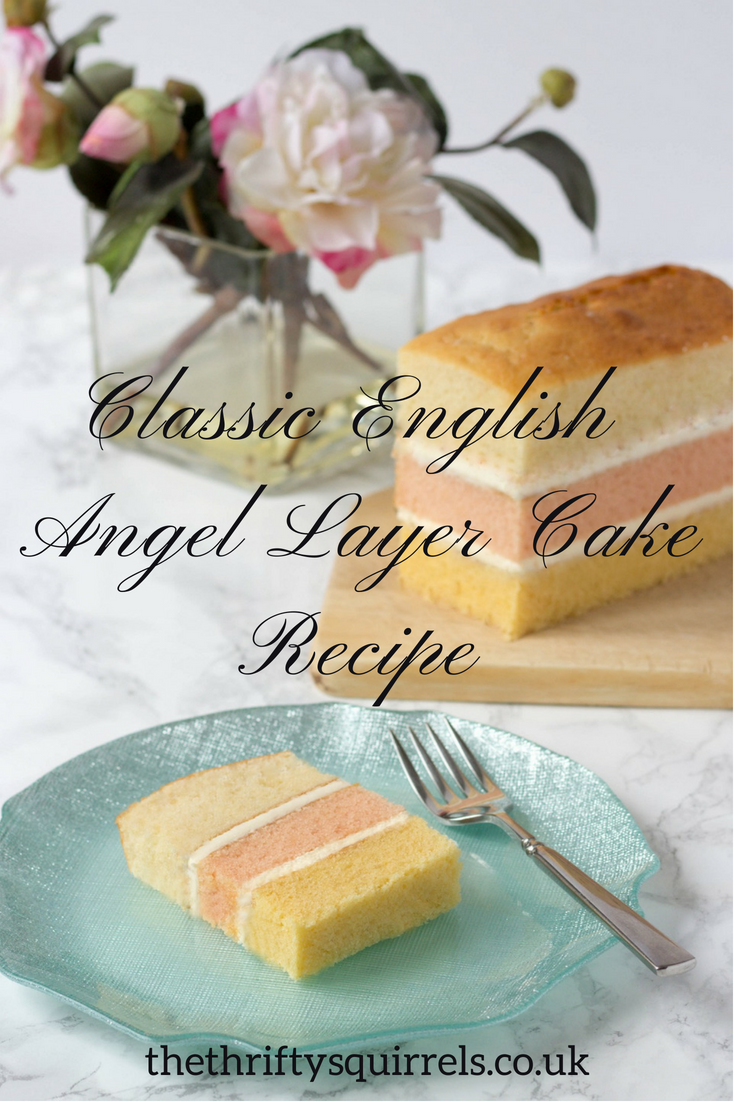
Angel cake has always been a firm favourite with my family. I mean the layered ones that you find in the supermarket with pink, yellow and white layers sandwiched together with buttercream. It is a classic English cake so beloved by generation after generation of cake lovers!
This is more than a simple sponge cake layered together – an ordinary Victoria sponge cake recipe simply will not give you the texture and flavour of a true Angel Layer Cake.
While the ingredients are a little expensive to buy, compared to a shop bought version, this Angel Layer cake is streets ahead in both flavour and texture…
This is angel cake as it used to taste!
This is a recipe I have worked hard to perfect and it is consistently one of the most popular recipes on The Thrifty Squirrels Blog. I’m so glad that so many of you are making and enjoying this classic cake!
To make the cake in layers I used my excellent Silverwood Multiway 12″ cake tin (link at bottom of post!)
With the extra dividers it is incredibly versatile, you’ll never need to buy another square cake tin and you can bake the different layers all at the same time!
I divided the pan into 3 sections each measuring 8″ x 4″, greased and lined each section and pre-heated the oven to gas 4 (350°F/180°c/160° fan).
You can also use 3 1lb loaf tins to bake the cakes or even bake them in 3 x 15cm (6″) sandwich tins.
Ingredients
7oz (200g) soft butter or baking spread (make sure it is suitable for baking and not one of the very low fat versions that isn’t)
9 1/2oz (270g) caster sugar
3 eggs, beaten
9 1/2oz (270g) plain flour
1 1/2 teaspoons baking powder
1 1/2 teaspoons vanilla extract
8 fl oz (225ml) soured cream
red and yellow food colouring
Ingredients for the Filling
2oz (60g) softened unsalted butter
5oz (140g) sieved icing sugar
1 tablespoon milk
Vanilla extract – a few drops (to taste)
Making Angel Cake
Happily, this is a fairly straightforward method!
First of all, sieve the flour and baking powder together into a bowl ready for later.
In another large mixing bowl, cream together the butter and caster sugar until very light and fluffy.
Add the beaten eggs a little at a time and beat well between each addition to prevent the mixture from curdling. If the mix does look like it will curdle, add a spoonfull or two of the flour and mix well before continuing to add the eggs as before.
When all of the egg has been incorporated, gently stir in half of the flour followed by half of the soured cream then repeat with the remaining flour and soured cream.
Divide the mixture into three equal amounts, placing 1 part directly into your 1 section of the cake tin and the other two parts into small bowls. Add a few drops of red food colouring to give a lovely shade of pink to one bowl and a few drops of yellow food colouring to the remaining mixture for a subtle yellow shade. Spoon these coloured cake mixes into the remaining sections of your cake tin and bake all 3 cakes at gas 4 (350°F/180°c/160°fan) for about 30-40 minutes or until the cakes are cooked through.
When the cakes are baked remove them from the tin and place on a wire rack to cool. When the cakes are cold, slice of the rounded tops of the pink and yellow layers so that the cakes will stack well when they are sandwiched together with the butter cream.
Making the buttercream
Beat the butter in a bowl while adding spoonfuls of the sieved icing sugar. When all of the icing sugar has been added, continue to beat the mixture until it is very pale. Add the vanilla extract and, if the mix is too stiff, add the milk to give a firm but spreadable consistency. If the buttercream is too firm it will be hard to spread on the soft cakes.
Assemble the Angel Cake
Place the trimmed yellow cake layer onto a serving plate and spread with half of the buttercream (it should be a fairly thin layer). Place the pink layer on top and spread the remaining buttercream onto the top. Finally, place the white cake layer (with it’s rounded top intact) on top to finish the cake. Trim the ends to give a lovely neat finish to your Angel Cake!
Here’s what we used:
12″ Silverwood Multiway Cake Tin

It is also worth getting the extra set of dividers
to give you any combination of sizes you could want.

Extra Dividers for the 12″ Silverwood Multiway Cake Tin
Made the Angel cake for a the bottom layer of a wedding cake for last Saturday. I made three batches of the cake mix and used a 10 inch cake pan each cake was about one and a half inches deep. It looked and tasted amazing. There were three tiers second was chocolate and third was red velvet. Decorated all three layers with pictures from beauty and the beast all drawn free hand.
Donna
wow…that sounds absolutely amazing!! So glad the angel cake recipe was a success
Hi
Making a wedding cake for a friend she wants one of the layers to be angel cake what size round tin should I use for this recipe.
Thanks Donna
Hi Donna,
What a lovely idea to have Layered Angel Cake as one of the layers on a Wedding cake!
Well, having done a few calculations I think the size tins you will actually be 3 x 7″ (18cm) sandwich tins.
I haven’t actually tried making the Layered Angel Cake as a round cake but I do love the idea so it’s on the list for testing in the not too distant future but please do pop back and let me know how it goes!
Thank you will do.
Donna
Hi David, this Angel Cake recipe is consistently the most popular here at The Thrifty Squirrels blog 🙂 I’m so glad you like it 🙂
Aways wanted this because this is my favorite cake of all time ty for this. Going to make this often once again ty
First time I have made this deliscious angel cake and will be making again it is better than the shop bought ones Thank you Thrifty Squirrels.
thank you Sharon 🙂 so pleased to hear you have enjoyed our recipe for this great and classic cake! More recipes coming up very soon!
Was disappointed as I have never used food colouring before. Cake sections went in yellow and pink came out of the oven white. The colouring bottle read not stable in oven.
The cake however was just like an angel cake. It was so delicious. All the family loved it.
Amazing and perfect recipe , thank you
Thank you for taking the time to post your comment Sandie! I’m so glad you and your family enjoyed the angel cake, very strange about the food colouring though. At least it didn’t spoil the taste of the cake 🙂
It’s been so long since I have actually bought an Angel cake that I had completely forgotten it had a yellow layer!
As you say, it’s only colouring so makes no difference to the taste but for an authentic look, one layer should definately be yellow!
Hope the you enjoy making the recipe, would love to hear how it turns out.
Thank you for posting this recipe! I’m off to bake it now. I agree that angel cake is ridiculously expensive for what is essentially a simple sponge. One comment though – I thought angel cake is one layer pink sponge, one layer white and one layer yellow? It’s only food colouring though, so makes no difference to the taste.
Have a lovely day. x